Create or select the exact paper size first, verify one label, and then save the working print settings as a named preset.
A preset should capture a known-good workflow, not a collection of guesses. The important distinction is between the PDF’s own dimensions, the selected paper size, and any scaling applied when the document is printed.
Start with measured stock and the right queue
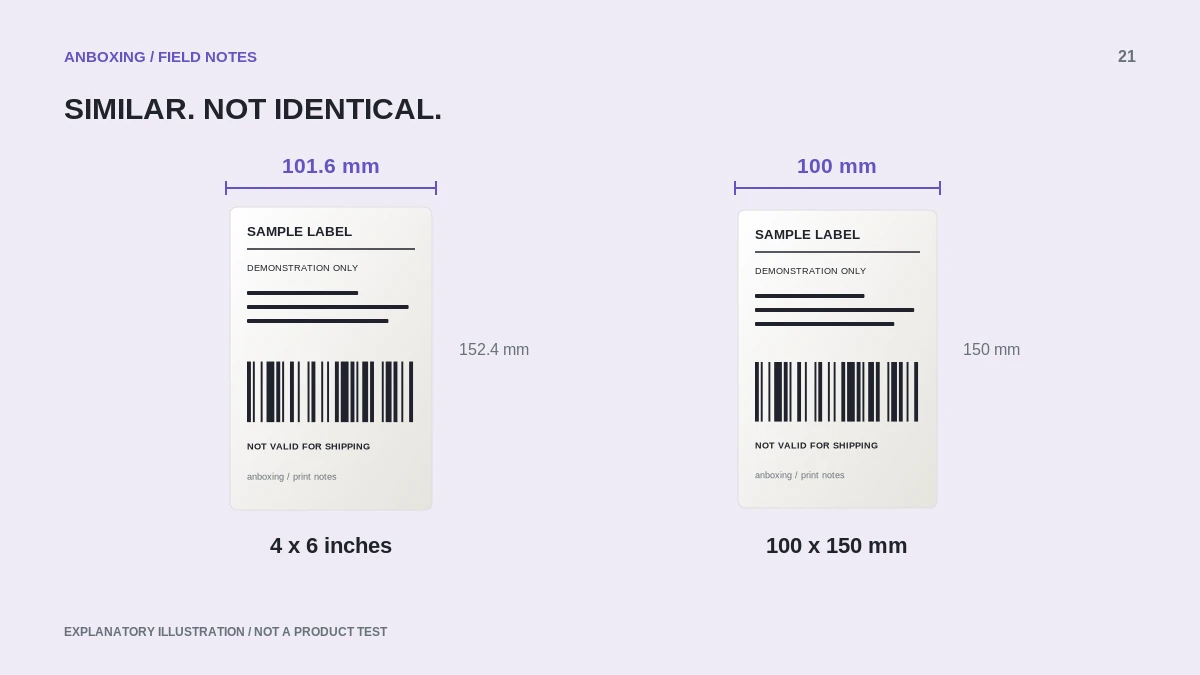
Read the label specification. Four by six inches is 101.6 by 152.4 millimeters; stock sold as 100 by 150 millimeters is close but not mathematically identical. Use the actual dimensions your printer and application expect rather than mixing those names casually.
Select the correct printer in the print dialog before choosing its paper settings. A preset created for another queue may expose different options, even when both queues refer to similar-looking hardware.
Create the size when it is supported
Apple documents File > Print, followed by Paper Size > Manage Custom Sizes, for apps and printers that expose the option. Add a clearly named size and enter its dimensions. Apple cautions that the options can differ by app or printer.
Apple: create a custom paper size on Mac
- Name the size by its dimensions, for example Shipping 4 x 6 inches. Avoid names such as Large or Best.
- Check the nonprintable margins against the printer documentation. Entering zero does not prove that the hardware can mark every edge.
- Open a correctly sized original PDF and confirm orientation and scaling in the print dialog.
- Print one page. Inspect the complete address and required marks, not just the largest text.
- After the result is correct, save the current settings as a preset using the options available in your print dialog.
A preset is not a repaired document
Adobe distinguishes printing at actual size from fitting a page into the printable area. If the original document is letter size with a small label inside it, a four-by-six paper preset alone does not turn the content into a proper thermal label.
Adobe: adjust PDF page size for printing
| What changes | What to recheck |
|---|---|
| New label dimensions | Paper size and media calibration. |
| Different PDF viewer | Whether its own scaling overrides the preset. |
| A second printer queue | Whether the preset is available and appropriate. |
| A letter-size shipping download | The platform export format before printing. |
Verify the preset survives normal use
Close the application, reopen the same PDF, and select the saved preset. Print another single test and compare it with the first. Then test a different legitimate label with the same page size. This catches a preset that only appears correct because the first document happened to fit.
Keep a note of the selected queue and app. Do not reset the entire Mac printing system merely to repair a paper preset: Apple says that reset removes all printers, completed-job information, and presets. Use narrower troubleshooting first.
Apple: what resetting the printing system removes
Common questions
Should I set every margin to zero?
Only when appropriate for the printer and document. A zero in the dialog does not remove a hardware printing limit.
Will one preset work in every application?
Not necessarily. Applications may expose or override settings differently, so check a known-good PDF in the app you use.
Sources & scope
Source-based editorial guide. Primary references checked September 9, 2026. Diagnostic sequences and comparisons are editorial guidance, not results of hands-on product tests. Confirm current instructions and compatibility for your exact model.